Categories
Photography

Photography Tip: #5 Use a Color Calibrated and Profiled Monitor

Photographers spend a lot of time thinking about color they even refer to things like “color science” when talking about how certain camera brands recreate the broad spectrum of colors in a digital image. When thinking about color, you want accuracy and consistency in your workflow to achieve the best results.

A key aspects of making sure you are getting accurate colors is to make sure you are using a color calibrated monitor.  I was late to the game on this in my photography journey and I really wished I had done this earlier.  It really makes a big difference in the quality and accuracy of the output. Why is color calibration so important?  When you are editing a file your display or monitor is the device that is taking the digital data from the sensor and translating it to the image that you see on the screen.  If your monitor is doing a poor job in his transformation you are editing from an incorrect baseline.  This will make it difficult to get accurate colors when you publish online or go to print your images.  Before I calibrated my monitor I would consistently see differences in output when looking at my photos on my iPad and iPhone or when printing them,  Those issues all went away once I was shooting RAW and editing on a calibrated monitor.

Using  a Calibration Device

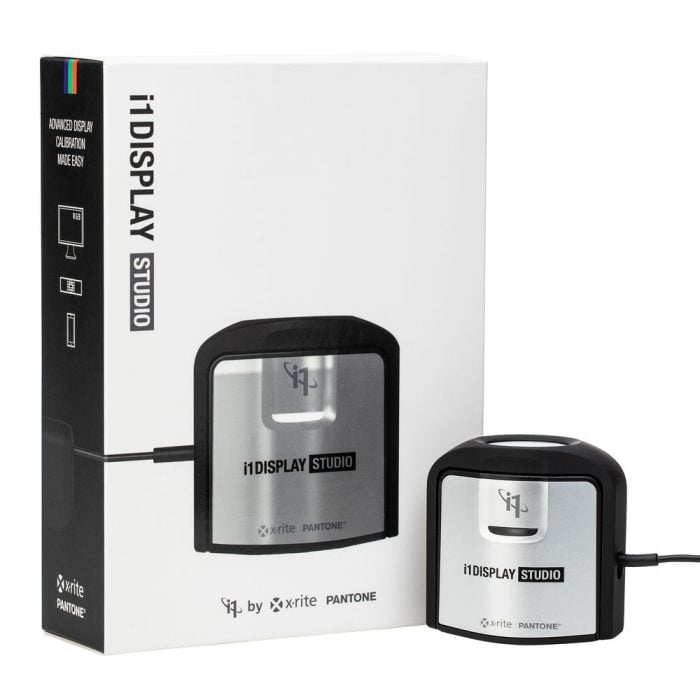
So how do you calibrate a monitor?  It is actually really easy.  Most monitors today can support using 3rd party color calibration devices.  These small optical devices can be placed on your monitor and will read and calibrate the output.  I purchased an X-Rite ColorMunki that they don’t make any more but it was replaced by the X-Rite i1 Display Studio.

From the X-Rite Site:

Color Perfectionists know that a calibrated and profiled display is a critical element in an efficient digital workflow. Nobody wants to spend hours at their screen perfecting images only to find that their display wasn’t accurately representing their digital files. What you see on your monitor (or projector) has to match your digital file or you will never be happy with the result, no matter how much time you devote to perfecting it.


With its easy-to-use, wizard-driven software, X-Rite ColorMunki Display offers everything you could possibly need to get you to a brilliantly-calibrated display or projector while helping you stay focused on doing what you love. Plus, with X-Rite ColorTRUE, a free mobile app, you can even calibrate your iOS and Android mobile devices. For Color Perfectionists seeking simplicity, the ColorMunki Display will absolutely amaze you. And you don’t need to be a color expert to benefit from ColorMunki Display.

So if you have not stated using a color corrected monitor I highly recommend starting soon

Categories
Photography

Photography Tip: #4 Use an Online Publishing Platform like SmugMug to Share Your Photos

I love taking pictures but I also love sharing them online with my friends and family. Back in 2000 I started sharing my albums online via this website. I used a newly added feature to Photoshop that would output an album in HTML for easy uploading to websites. That worked for a few years but it quickly became difficult to manage. When I got my Canon 10D in 2004 I knew I needed a better option. I looked around and found some great reviews of a site called SmugMug and have been using it ever since.

Publishing on SmugMug

I have been using SmugMug for 15 years and love the service they provide! It is fast, intuitive, and makes publishing my images online super simple. They have an awesome plugin for Adobe Lightroom where I can literally have an album published with a few clicks without ever having to leave Lightroom. The plugin even keeps my Lightroom albums synced with my SmugMug albums for any changes.

Here is how I work with SmugMug in 5 simple steps from inside Lightroom:

  1. I use a date based hierarchy on SmugMug that matches my local albums: YYYY -> YYYYMMDD Album Name
  2. When an album is ready to be published in Lightroom, I select all in grid view.
  3. Right click on the year folder in the SmugMug plugin where I want the album to go and select new gallery with include selected items checked.
  4. In the new gallery dialog box I paste the name of the album and usually leave all other defaults as is
  5. Hit publish and I am done!

There are a lot of different services for photo publishing but I have found that SmugMug works best for me.

Categories
Photography

Photography Tip: #3 Invest in Learning Editing and Post Processing Skills

Previous Tip: Photography Tip: #2 Shoot Using the RAW File Format

Shooting is only half the battle

Capturing images with your camera is only the first half of photography today. The second half, and equally as important stage, is editing and post processing your images. All images from modern cameras need some level of edits or tweaks in post processing to have them reach their full potential. When I am talking about post processing, I am keeping most of the original structure and content of the photo intact. I am not referring to major edits like replacing people, structures, backgrounds etc. that would require Photoshop. Edits like that are beyond the scope of this article.

Selecting your tools

I use Adobe Lightroom CC Classic as my digital darkroom for processing all my edits.  Lightroom is the most popular tool in the industry but there are competitors like Capture One and Luminaire that are trying to take market share from Adobe.  I have used Lightroom since version 4 in 2013. I upgraded to v5 and v6 and stayed on v6 as I did not want to move to a subscription license. Ultimately I caved last year, and upgraded to v9 that I am on today.

As the industry leader in post processing, Adobe Lightroom has a large following and is a strong tool for managing, organizing, and editing all of your photos. I spend a lot of time in Lightroom. It is easily my most used application at home and I custom built my most recent computer to focus just on Lightroom performance. Overall I am happy with what it provides. There could definitely be some improvements, especially when it comes to speed, but it gets the job done for me and helps support my workflow.

Adobe Lightroom is powerful but with a steep learning curve

Adobe Lightroom is an incredibly complex piece of software with a very steep learning curve. I consider myself to be pretty advance when it comes to technology and applications but it has taken a lot of time to get comfortable in Lightroom. Even with this investment, I still find myself learning something new almost every week. At times I feel like I am only just scratching the surface of what can be done with Lightroom!

I encourage you to pickup some book and sit down and make a commitment of time and energy in learning Lightroom (or the tool of your choice). As a photographer today you have to be well versed in both capturing and editing photos in today’s digital world!

Next Tip: Photography Tip: #4 Use an Online Publishing Platform like SmugMug to Share Your Photos

Categories
Photography

Photography Tip: #2 Shoot Using the RAW File Format

Previous Tip: Photography Tip: #1 Only Show Your Best Work

The RAW format is the digital negative file taken directly from the imaging sensor with no edits or in camera processing.

I get it, switching from JPEG to RAW is scary.  JPEG is so easy you just shoot download and it is instantly available to view on your computer and publish almost anywhere.  JPEG files are the most common and easiest to view image files that exist.  Almost every digital display device in existence supports viewing a JPEG file.

Benefits of switching to RAW

So why switch from the soft and cozy comfort of JPEG? One word flexibility. The big benefit of shooting in RAW is you have so much more flexibility when it comes to the editing and post processing of your images. Underexpose a shot by more than a full stop? No problem, pull that exposure right back in editing. Want to change the white balance since you bounce flashed off a yellow ceiling? Easy, you can completely change the white balance or adjust multiple stops of exposure in editing. You can also pull out detail that you never knew existed when you were just shooting JPEG. Most enthusiasts and pros I know all shoot RAW but there is one scenario where it can be more beneficial to shoot JPEG: Speed! RAW files are really big. My Sony a7r III outputs 42MB compresses RAW files! If you are a sideline sports photographer, or a photo journalist trying to hit a deadline, you can’t wait for 42MB files to transfer to your editor. In these industries most people are shooting JPEG,  since speed is more important than the absolutely best image quality.

My RAW journey started with my Canon 5D Mark II. After reading all the benefits of RAW, I started shooting in RAW+JPEG mode so both file formats were captured with every shutter release. I shot like this for almost a full year before I was finally comfortable enough shooting RAW to leave the JPEG capture turned off.

A big reason why RAW files can be so intimidating is that the software to process them is complex and challenging to learn. I use Adobe Lightroom Classic as my RAW processor and it has taken a significant investment of time to learn how Lightroom works and to be comfortable in it. It is an extremely powerful piece of software but it has a pretty steep learning curve to get the most out of it.

RAW files will require some work in post processing

The second hindrance to RAW adoption is that the initial file rendering in the RAW processor is flat. People often complain that when using RAW their images look much worse than the in camera generated JPEG file. While the initial RAW files are flat, some simple edits can pull out all the detail and make an image pop. For example, on my Sony a7r III there are typically 8 edits that are made to almost every image that bring it to life:

White Balance: in natural light, Sony usually gets this right with only small tweaks needed in temperature or tint.
Exposure: +0.3 Sony consistently under exposes images by 1/3 of a stop.
Contrast: +5
Highlights: -0.4 to -0.6 depending on image
Shadows: +0.4 to +O.6
Whites: +0.15
Blacks: -0.20
Vibrance: +15

Once I apply these edits on a Sony RAW file I usually have a good baseline for additional tweaks.

Adobe DNG Standard

So what about DNG? DNG is Adobe’s open standard for RAW files or “Digital Negative”. For a few years I switched over to DNG after reading this article on Photography Life. In practice it sounds great to have a universal standard, but DNG really never gained much traction  so I decided in 2017 to convert back to storing standard Sony RAW files as my digital negatives.

Don’t be afraid! Make the switch today to shooting RAW. I promise it will be a worth while investment of your time!

Next Tip: Photography Tip: #3 Invest in Learning Editing and Post Processing Skills

Categories
Photography

Photography Tip: #1 Only Show Your Best Work

Photography is one of my passions and hobbies. This post is the start of a running series of tips and tricks on photography that I have learned over the years to improve my work. I am by no means a professional, but hopefully these quick tips will help you take and share better photos. If you have a specific topic you would like me to cover or have a question leave a comment below. You can always view my albums on SmugMug

Be Ruthless with Selection

My first tip is the one that I think has helped me more than anything else in the last 10 years. Only show your best photos and be absolutely ruthless when evaluating the quality of the photos you have taken.

Here is a secret, I take a lot of bad phots! Yup, they are out of focus, under exposed, over exposed, bad composition, etc. The trick here, is I make sure nobody ever sees when things have gone wrong. On a typical photo session, I am shooting at a ratio of 1/20. For every 20 photos I take I will end up with 1 keeper that will be edited and published. With that said, I am always trying to improve my skills and lower this ratio but a big part of learning is making mistakes and seeing what went wrong.

When evaluating photos as part of my workflow, I am only looking for “Picks” (Lightroom shortcut P). No stars, no ratings, no deletes. Just a simple question: would I be proud to publish this photo and would people have an interest in looking at it. Once I do a first full pass and hit all my selects, I then step back and look at how the album has come together.  I will then do a secondary pruning to “Unselect” (Lightroom shortcut U) images. I will remove photos that are too similar and delete what I think are the weakest images in the album. Now I hit the Lightroom develop module and start editing! Once all the edits are done, I do a final review and make sure I love each of the images and how they tell the story of the full album. There are usually only a handful, if any unselects at this stage. I then hit the publish button!

The only time I make some compromises on image quality is when I am documenting events like my daughters graduation.

The lighting was terrible and we were seated in the back and I just had to make the best of it as my daughter only graduates pre-school once 😀. The other exception, is when I am in documentation mode on my iPhone. For these images, I am just snapping pics to capture moments. I am not editing them and just throw them all in a single album each year to serve as a timeline of the year.  They also usually include a lot of selfies like the below shot with Brendan:

Next Tip: Photography Tip: #2 Shoot Using the RAW File Format