Categories
Personal Finance

Putting Your Finances on Autopilot

One of the biggest tricks of personal finance is automating everything so you don’t need to think about it!  You set the goals, implement the strategy, and then sit back and let the automation take care of everything.  Here is a run down of how we execute our personal finance “system”.

Paycheck

Let’s start with the easy stuff like your paycheck.  Most companies will offer (or even require) direct deposit so you are not having to deal with paper checks.  Set your deductions like your 401k, HSA, FSA, according to where you are in the investment walk.  By doing this you are “paying yourself first” which is a great concept to achieve financial independence.  Some people will get fancy and separate their paycheck between different accounts but I like the simple approach of having it all deposited in a single account.

Banking: Checking and Online Savings

I opened my first online bank account in 2000 and have been doing my banking online for the last twenty years. In 2016, we moved to Ally Bank for our primary checking and savings accounts and love working with them. Customer service is great, they reimburse ATM fees, have competitive savings account rates, and a great app for mobile check deposits. Another feature I highly value is that our checking account is automatically linked to our savings account.  If we ever overdraw our checking account, Ally will grab the required funds from our savings account so we never have to pay overdraft fees.

In addition to Ally, we also have a no fee checking account with Chase so we have access to a local ATM to make cash deposits.  The Chase and Ally accounts are linked so transfers between them are easy. We don’t use this account much but have found it helpful when we needed it.

Credit Cards

We use credit cards to help with automation and we get the benefit of earning rewards each month.  All the credit cards we use are setup for automatic payment of balance in full from our Ally Checking account each month. We currently have three active cards:

  1. Costco Visa: This is our primary card for 99% of our spending
  2. Amex Blue Delta Skymiles: Delta offered me 75,000 bonus miles last year to signup for this card so I got it. We now only put Delta purchases on this card.
  3. Amex BlueCash Everyday: Backup card with no annual fee we charge one small bill a month on this card to keep it active

I switched to using the Costco Visa Card a few years ago as I decided the cash was more valuable given that I earn so many Delta flight miles traveling for work each year.  However, I am rethinking that strategy and might do some travel hacking and take some flexible points instead of the cash.  More to come on this!

2019 spending by category on the Costco card:
Description Spend %
4% On Eligible Gas Worldwide 1.4%
3% On Restaurant Purchases Worldwide 5.9%
3% On Eligible Travel Purchases Worldwide 0.9%
2% On Costco & Costco.com Purchases 13.0%
1% On All Other Purchases 77.7%
2019 Cash Rebate Earnings 1.30%

In 2019, we averaged a 1.3% cash rebate on the Costco card.  That is ok, it is just not great.  In looking at the numbers, I should probably only be putting the Costco purchases on the Costco Visa as I should be able to do much better than 1% via another card.

If a bill allows payment via a credit card we use it!  Here are the kinds of items that all get paid automatically each month or billing period with the credit card: Electricity, Mobile Phone, Internet, Online Services, Home Security, Garbage, and Natural Gas.

Online Bill Pay

There are a few companies that don’t allow credit cards, so this is where online bill pay comes in handy.  Some bills can get setup as direct ACH bank transfers but there are others that will require a physical paper check to be mailed. What is this 1980? Ally handles both of these scenarios well and we use online bill pay for things like our HOA dues, homeowners insurance, and life insurance payments.  All of these are setup to be automatically sent

Don’t Get Your Water Turned Off!

All of our bills are setup to be paid automatically via one of the above methods except one:  the water bill.  The problem with our water bill is that it is a variable amount each month and the water company does not have a mechanism to do an automatic draft from a credit card or a bank account.  This is super annoying as I now have one bill that I need to remember to pay each month!  And guess what, a few years ago I forgot about it.  I was sitting at work around 4pm and I got a call from Crystal that our water had been turned off!  DOH!  This did not go well for me as it took the water company 2 days to get the water turned back on!

After this happened, I came up with a trick to make sure the water never got shut off again. The first thing I did was I overpaid the next water bill by $100 so we had a positive balance.  The next thing I did was I setup an automatic check to be mailed each month for a fixed amount of our average monthly usage.  Problem solved!  The water bill now gets paid automatically each month!

Automated Investments

Now that we have the income and bills accounted for, the final part of the automation system are the investments.  We have four investments that are automatically pulled out of our checking account each month:

  1. Vanguard VTSAX investment on the 1st and the 15th
  2. TIAA-CREF Equity Index Fund on the 1st of the month into both Brielle and Brendan’s GA 529 college savings accounts.

The above system works well for us.  We keep a small buffer in the checking account to account for any variances in the month and if we have a big purchase or unexpected expense we will instantly transfer money from the online savings account to the checking account.  With this system, combined with the visibility that Mint provides on the transactions, there is very little maintenance to do each month.  Just sit back and let the system work for you!


Categories
Photography

Photography Tip: #5 Use a Color Calibrated and Profiled Monitor

Photographers spend a lot of time thinking about color they even refer to things like “color science” when talking about how certain camera brands recreate the broad spectrum of colors in a digital image. When thinking about color, you want accuracy and consistency in your workflow to achieve the best results.

A key aspects of making sure you are getting accurate colors is to make sure you are using a color calibrated monitor.  I was late to the game on this in my photography journey and I really wished I had done this earlier.  It really makes a big difference in the quality and accuracy of the output. Why is color calibration so important?  When you are editing a file your display or monitor is the device that is taking the digital data from the sensor and translating it to the image that you see on the screen.  If your monitor is doing a poor job in his transformation you are editing from an incorrect baseline.  This will make it difficult to get accurate colors when you publish online or go to print your images.  Before I calibrated my monitor I would consistently see differences in output when looking at my photos on my iPad and iPhone or when printing them,  Those issues all went away once I was shooting RAW and editing on a calibrated monitor.

Using  a Calibration Device

So how do you calibrate a monitor?  It is actually really easy.  Most monitors today can support using 3rd party color calibration devices.  These small optical devices can be placed on your monitor and will read and calibrate the output.  I purchased an X-Rite ColorMunki that they don’t make any more but it was replaced by the X-Rite i1 Display Studio.

From the X-Rite Site:

Color Perfectionists know that a calibrated and profiled display is a critical element in an efficient digital workflow. Nobody wants to spend hours at their screen perfecting images only to find that their display wasn’t accurately representing their digital files. What you see on your monitor (or projector) has to match your digital file or you will never be happy with the result, no matter how much time you devote to perfecting it.


With its easy-to-use, wizard-driven software, X-Rite ColorMunki Display offers everything you could possibly need to get you to a brilliantly-calibrated display or projector while helping you stay focused on doing what you love. Plus, with X-Rite ColorTRUE, a free mobile app, you can even calibrate your iOS and Android mobile devices. For Color Perfectionists seeking simplicity, the ColorMunki Display will absolutely amaze you. And you don’t need to be a color expert to benefit from ColorMunki Display.

So if you have not stated using a color corrected monitor I highly recommend starting soon

Categories
Personal Finance

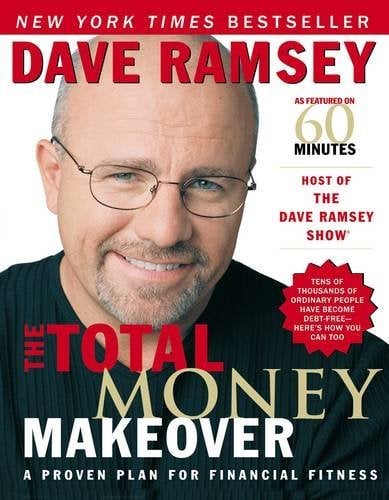
Book Review: The Total Money Makeover by Dave Ramsey

The Total Money Makeover: A Proven Plan for Financial Fitness

Author: Dave Ramsey
ISBN: 159555078X
Amazon Link: 
https://www.amazon.com/gp/product/0785263268
Table of Contents:

Chapter 1: The Total Money Makeover Challenge
Chapter 2: Denial: I’m Not That Out of Shape
Chapter 3: Debt Myths: Debt Is (Not) a Tool
Chapter 4: Money Myths: The (Non)Secrets of the Rich
Chapter 5: Two More Hurdles: Ignorance and Keeping Up with the Joneses
Chapter 6: Save $1,000 Fast: Walk Before You Run
Chapter 7: The Debt Snowball: Lose Weight Fast Really
Chapter 8: Finish the Emergency Fund: Kick Murphy Out
Chapter 9: Maximize Retirement Investing: Be Financially Healthy for life
Chapter 10: College Funding: Make Sure the Kids Are Fit Too
Chapter 11: Pay Off the Home Mortgage: Be Ultra-Fit
Chapter 12: Build Wealth Like Crazy: Become the Mr. Universe of Money
Chapter 13: Live Like No One Else

An influential voice in my personal finance journey

Dave Ramsey played a key role in my personal finance journey so I decided I had to publish a review of his best selling The Total Money Makeover which I first read back in 2006! While some of Dave Ramsey’s methods and advice are debated, there is no denying that he is the most popular figure in America when it comes to personal finance and money.  He has just published his 3rd edition of this book which has sold more than 5 million copies! The Amazon stats on the 2nd edition are impressive:

Average Customer Review: 4.7 out of 5 stars 4,071 customer reviews
Amazon Best Sellers Rank: #24 in Books (See Top 100 in Books)
#2 in Education Funding (Books)
#1 in Christian Stewardship (Books)
#1 in Education Workbooks (Books)

Here is his complete Biography:

Dave Ramsey is America’s trusted voice on money and business. He’s authored five New York Times best-selling books: Financial Peace, More Than Enough, The Total Money Makeover, EntreLeadership and Smart Money Smart Kids. And check out his new products: Financial Peace Junior and Junior’s Adventures Storytime Book Set! “The Dave Ramsey Show” is heard by more than 8.5 million listeners each week on more than 550 radio stations, “The Dave Ramsey Show” channel on iHeartRadio, and a 24-hour online streaming video channel. Ramsey Solutions offers a suite of products and services to help people get control of their finances and other aspects of their lives. Follow Ramsey on Twitter at @DaveRamsey and on the web at daveramsey.com.

How I stumbled on Dave Ramsey

Here is a little background on how I discovered Dave Ramsey and the principles that he teaches. In 2008, I moved to Atlanta to work for The Home Depot. I was just starting to learn some of the radio stations on my way home from work and I stumbled on the Dave Ramsey show and became a regular listener.

I view Dave Ramsey as a great start on your path to financial independence. Sort of like Personal Finance 101 class. If you are living beyond your means racking up all kinds of debt and have really no clue on how to manage your finances Dave is great for this type of person which I might add is most of the country. I think this is why Dave resonates with such a broad audience. If you are looking for advanced classes on personal finance Dave is not going to be the right resource for you.

So let’s look at the actual book now.  The first 5 chapters lay the foundation for how so many peoples finances are a disaster: over spending, maxing credit cards, and ridiculous car payments.  Dave nails the keeping up with the Jones mentality and how if you want to be broke your entire life keep doing what everybody else is doing.  After Chapter 5 Dave lays out his 7 baby steps which provide an alternative lifestyle to looking wealthy but being broke. Let’s look at each of the baby steps:

BABY STEP 1: Save $1,000 for your starter emergency fund.

I like this first step. You need to have a small cushion in your life so that when your water heater blows a leak your life is not thrown upside down!

BABY STEP 2: Pay off all debt (except the house) using the debt snowball.

This is one of Dave’s most controversial topics. Most finance gurus will tell you to pay off debt with the highest interest. And mathematically that is absolutely the right approach. The problem is personal finance is not all about math, human behavior is at play. I like what Dave advocates here as the momentum you can gain from paying off the small debts is powerful.

BABY STEP 3: Save 3–6 months of expenses in a fully funded emergency fund.

100% agree with this step. It is the first step in my own investment walk as well.

BABY STEP 4: Invest 15% of your household income in retirement.

I disagree with this. 15% is too low! You need to be maxing out your retirement accounts as early as possible to get the incredible long term benefits of compounding! Read my investment walk

BABY STEP 5: Save for your children’s college fund.

I like this advice. My parents paid for my education and we want to do the same for our children. We make deposits in both of our kids 529 plans every month as part of having our finances on Autopilot.

BABY STEP 6: Pay off your home early.

This is another of Dave Ramsey’s very controversial recommendations. This topic could take up an entire post but here is the short version! The finance gurus say you should never pay off your mortgage since you can get better returns in the market. Again, the math might say so but the freedom that being debt free is incredibly powerful.

BABY STEP 7: Build wealth and give.

I have a lot of disagreement with Dave Ramsey on this step.  While the premise is good, I don’t like the way in which he advocates for building wealth.   He recommends mutual funds via his advisor network which will just result in excessive sales commisions and fees.  As a strong beliver in index funds and being a 100% VTSAX investor this is just bad advice!

His message that “if you live like no one else you can live like no one else” at this stage absolutely resonates but there is a lot more to this step than Dave details out. Again, a good start, but there are much better guides out there for the more advanced saver and investor like JL Collins outstanding The Simple Path to Wealth.

I have given this book to family members and as wedding presents as I think the overall message is pretty solid advice. Especially against the backdrop of the typical American train wreck of negative savings rates and maxed out credit card debt.  Just skip his investing recommendations!

My Rating: 3.5 Stars


Categories
Personal Finance

We All Have Blind Spots

Over the past couple weeks I have started listening to a few financial independence podcasts.  One that I really like so far is choosefi.com.  Jonathan Mendonsa and Brad Barrett are the hosts and they do a great job talking about FI in a very engaging and personal way.  They also have guests on the show like Brandon from the madfientist.com and Liz from frugalwoods.com which were really good episodes!

So that brings me to today. I am on my commute into work this morning and I started playing Episode 13: THE UNFAIR (FI) ADVANTAGE OF TEACHERS | 457B. This episode caught my eye as my wife Crystal had been a public school teacher for 17 years before staying home with the kids.  Jonathan and Brad tee up the show and introduce Ed the “Millionaire Educator” who begins talking about the  different retirement strategies he has employed as a teacher in Georgia using accounts like the 403(b) and 457(b)

I just dropped two dozen eggs

You know that sinking feeling you have when you instantly recognize a giant screw up?  Maybe something like dropping a carton of eggs all over the kitchen floor? You just stand there with your jaw open and you say to yourself WTF just happened?  You are looking for the time machine button to rapidly transport you back in time so a different decision can be made!  That is pretty much what happened on my commute in today.  I literally sat in my car in total bewilderment after listening to the first 15 minutes of this podcast.

So what happened? I simply did not know that as a public school teacher, Crystal had access to a 403(b) and a 457(b) during her entire 17 year teaching career!  I had heard of these accounts before but I never spent any time learning about how they actually worked.  I always thought of them just for federal workers so had dismissed them.  Had I known about these two programs, we would have been maxing these accounts out for at least a decade if not more.  The tax deferred benefit of these accounts would have been a minimal 6 figure benefit and more likely a 7 figure benefit over a multi decade retirement. Gulp!

Always be learning and don’t get too comfortable

I learned an important lesson today.  It does not matter how much you think you know about a particular topic there are always more things to learn.  Don’t ever get too comfortable thinking you have things completely figured out.  I never guessed I would have made a mistake like this, but it turned out I had a big blind spot related to how these these accounts function and who can take advantage of them. This mistake will sting for a while, but you can’t go back in time to fix it so you just have to move forward and learn from it.

Jonathan and Brad have a set of 5 questions they ask every guest at the end of the interview.  One of them is “What is the biggest financial mistake you have made?”  After today, I know exactly what my answer would be!

Categories
Personal Finance

Annual Financial Review – Get Your Financial Life in Shape!

For the past 10 years I have got into the habit of doing a financial review at the beginning of January. The goal of this review each year is to look back on the prior year to see what we accomplished, where our money went, and map out a game plan for next year. I believe that conducting an annual financial review like this is critical to staying on track and achieving your financial goals. Here is a summary of what I do and the steps to replicate it.

Step 1: Using Mint to categorize your transactions

In order to execute this financial review, you need to be tracking your financial transactions throughout the year.  I have been using Mint for more than 10 years and it is a great tool! I have every financial transaction we have made going all the way back to 2008. If you are not using Mint I highly recommend you start today at mint.com

Once you have Mint setup, it is easy to assign transactions to predefined categories or create your own custom categories. I use the default categories for 95% of my transactions. Mint is also good at predicting where a transaction should go. If Mint gets it wrong, you can easily create rules to automatically assign transactions to categories based on the merchant and description. I find this works really well and I usually don’t need to touch many transactions manually. Assigning transactions to categories is also really helpful with budgeting but that is a topic for another day!

Step 2: Downloading your data from Mint

Once you have all the transactions assigned to categories you can easily download this data to complete your annual financial review. Mint provides some basic yearly summary reports but I have found them very limiting. What I really want to see is a multi-year view of all my categories along with income and savings over time. By downloading the data into an Excel file, I can create exactly the view I want. To download your transactions, log into Mint and go to the transactions page. On that page, scroll down to the bottom and you should see a small link “Export all transactions”:Mint download all transactions for financial review
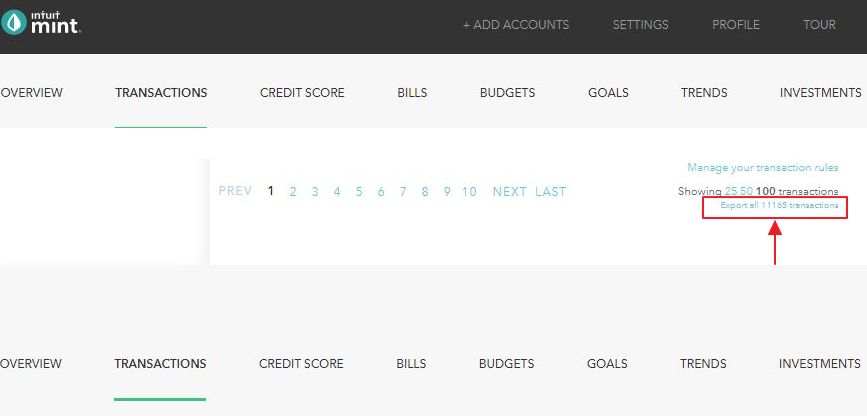
Wow, I currently have 11,165 transactions in Mint!  When you click on the above link your browser will download a CSV data file with all the transactions since you started using Mint. The CSV file will contain all the important fields:
Date
Description
Original Description
Amount
Transaction Type
Category
Account Name
Labels
Notes

Step 3: Importing Mint data into the Excel document

Now that you have the data it is time to import into the Excel file. Download the excel template that I use here:
Example Annual Financial Summary v1

Note: The template file is populated with some sample data just to help show how it works. I have also shaded all the input fields in blue to separate them from the formula fields.

The excel template file contains 11 tabs:

  1. Summary KPI’s: The rolllup of all the KPI’s
  2. BalanceSheet: Record all your year end account balances
  3. Income: Record paycheck data and income
  4. Expenses: Detailed categorization of all expenses
  5. Taxes: Record all 1040 and income tax return data
  6. Investments: Categorization of all Investments
  7. HSA-Medical-Dental: Record all HSA transactions
  8. SSA-Earnings: Lifetime recording of social security income
  9. MintDataPivot: Pivot Chart view of all Mint transactions
  10. MintDataTransactions: All the Mint transactions
  11. MintCategoryHierarchy: Default and custom Mint categories

We will start with the MintDataTransactions tab that currently contains the sample data. Open the Mint CSV file that was downloaded, select all the data, copy and then paste the data into MintDataTransactions cell F1. Next you will want to copy the formula in Column A-E to the bottom of your data set. These columns add some additional attributes to the data that I find helpful.  The check duplicates is included as Mint will sometimes have bank communication issues that results in duplicate transactions. This attribute identifies transactions with the same date, description, and amount as possible duplicates.  If you do find any duplicates you can go into Mint, mark them as duplicates, and re-download.
TIP: If I find any errors or issues with the Mint data I always go back and make the edits in Mint.  This keeps the source data clean and then I re-download to the excel file.  Don’t edit the Mint transaction data in Excel! 

Step 4: Reviewing the expense data

Once the Mint data is entered go to the MintDataPivot tab and refresh the data. You should now see all of the sample data replaced with your own data broken out by category and year.  I like using the pivot data view for a quick overview and to help find any potential data errors.  The pivot view is simple but is a little restrictive in terms of formatting so I like to use Excel SUMIFS formulas instead to get the data in exactly the view I want.  To do this we will now move to the Expense tab.

The expense tab is driven my a formula template that looks like this from cell B3:
=SUMIFS(MintDataTransactions!$I:$I,MintDataTransactions!$A:$A,Expenses!B$2,MintDataTransactions!$K:$K,Expenses!$A3,MintDataTransactions!$J:$J,”debit”)-SUMIFS(MintDataTransactions!$I:$I,MintDataTransactions!$A:$A,Expenses!B$2,MintDataTransactions!$K:$K,Expenses!$A3,MintDataTransactions!$J:$J,”credit”)

In simple terms: sum the amounts from MintDataTransactions in Column I, with a match against the year in Expenses B2 and the category from Expenses A3. Add those values up for debits,  do the same for credits, and take the difference between them.  In addition, the formula uses relative references so it can easily be copied between cells as you adjust the format for how you want your categories listed.

Entering and Organizing Expense Categories

The template file is organized by the Mint default categories and I have also added a few custom categories that I use.  You can completely customize this tab with additional categories/rows that you may have added to Mint. You can see what I am tracking by looking at the MintCategoryHierarchy tab.  This tab allows for the sections and categories to be listed separately which I prefer.  The key to the expenses tab, is making sure that you have all the categories that you use on Mint included for a complete picture. I also like using the default top level categories that Mint does and then putting sub categories under each main category like this
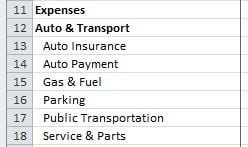
Once you have all the categories included and organized make sure the formula from B3 above is copied to all the rows that have categories and columns that have years.  You can use Column A from MintDataPivot to see if you have not included any categories.
TIP: I exclude Income, Investments, and Transfer transactions from Mint in the expenses view as I like to have those on separate tabs.

Medical and Dental EXPENSES

I use an HSA so all my medical and dental expenses are run through a debit card linked to my HSA.  Unfortunately these transactions can’t be linked to Mint so I manually download them to the HSA-Medical-Dental tab and then use this formula in cell B101 to bring the data in:

=SUMIFS(‘HSA-Medical-Dental’!$E:$E,’HSA-Medical-Dental’!$A:$A,Expenses!B$2,’HSA-Medical-Dental’!$G:$G,Expenses!$A101)

Reviewing Each Expense Line

Once I have all the data categorized on the expenses tab, I then go line by line and review our spending for the year. I look at the variance to last year,  and what the trend looks like year over year.  I will typically find a number of categorization issues during this step.  For example, this year I saw that our electricity usage was much higher than last year and our gas bill was much lower.  After looking at the mint data, I realized that half way through the year our gas provider changed their billing name. Mint got confused with this and started allocating the gas bill to electricity.  These types of issues are all easily fixed in the transactions tab in Mint.  After going through all the data and fixing any issues, I re-download the data and import to refresh the data.

The power of the expenses tab is the data!  Being able to see exactly where your money is going and how it changes over time is the only way you can truly begin to optimize your spending and makign sure you are spending less than you make.

Step 5: Record account balances

After expenses, we now move to the BalanceSheet tab. On 12/31 each year I will screenshot my Mint summary screen and manually record all the account balances in the excel file.  On this tab, you will enter all your assets, liabilities, and then be able to calculate your net worth. The sample file includes some common accounts but you will need to customize this for your particular situation.  After entering all the data,  double check your calculations against the net worth calculation in Mint to make sure everything is included.

Tracking your net worth over time is critical.  It is the key to financial independence, and is the most important KPI to be tracking.

Step 6: Record your income information

Next, we will move to the Income tab but before we do there is a critical step: download and save a copy of the last paycheck of the year! The end of year paycheck is super helpful as it includes all your full year earnings information.  I only started doing this 5 years ago and really wish I had started doing it when I first started working.  You can piece together parts of your full year income from tax returns, but having the actual paycheck is a lot easier as it provides a better picture with all the deductions. The Income tab includes space for two paychecks but you can modify as needed. Line 62 on the Income tab adds up both paychecks to Total Net Pay.

Comparing Mint Income to your Paycheck

Once you have entered all your paycheck information, we now need to include other income sources like interest and dividends for a complete picture. Mint lets you categorize your income so we will leverage the Mint data again to help us with this. In cell B66 we use the same formula template that we used from the expenses tab:

=SUMIFS(MintDataTransactions!$I:$I,MintDataTransactions!$A:$A,B$1,MintDataTransactions!$K:$K,$A66,MintDataTransactions!$J:$J,”credit”)-SUMIFS(MintDataTransactions!$I:$I,MintDataTransactions!$A:$A,B$1,MintDataTransactions!$K:$K,$A66,MintDataTransactions!$J:$J,”debit”)

Here are the categories that I use for additional income but these can all be customized for how you would like to view the data:
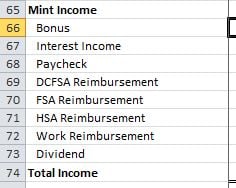
On line 63 I include a “Variance to Mint” line as a data check against the Paycheck/Bonus/Dividend categories in Mint as those are all recorded to Income.

Step 7: Record social security

The Social Security Administration has a great website for tracking all of your earnings and contributions. Each year I log into ssa.gov to make sure the information is accurate and I also download our annnual social security statements.  Once I have downloaded the statement, I will record our lifetime earnings information on the SSA-Earnings tab.  We will use this data later when talking about the KPI’s

Step 8: Review investment information

Next, we move to the investments tab.  This is where we record what investments were made each year.  The 401k amounts are pulled from the paycheck information on the Income tab.  Next, we will manually enter the 401k match (if any) on lines 6 and 7.  Finally, we have 4 lines for primary investment accounts.: 

Roth IRA
IRA
529 Plan
Index Fund

I categorize these types of transaction in Mint using custom categories under “Finnacial”. Since these are recorded in mint, we can leverage the same data formula we have used above.  In cell B8 for Roth IRA:

=SUMIFS(MintDataTransactions!$I:$I,MintDataTransactions!$A:$A,Investments!B$2,MintDataTransactions!$K:$K,Investments!$A8,MintDataTransactions!$J:$J,”debit”)-SUMIFS(MintDataTransactions!$I:$I,MintDataTransactions!$A:$A,Investments!B$2,MintDataTransactions!$K:$K,Investments!$A8,MintDataTransactions!$J:$J,”credit”)

Step 9: Taxes

Understanding how taxes influence your total financial picture is very important.  You will not be able to fill this part out until after you get all your W2’s and file your taxes.  I  like to record all the W2 tax information in this file along with high level tax information like: Adjusted Gross Income,  Federal/State Taxable Income, Total Federal/State Tax, and Effective Federal/State Tax Rate.

Step 10: Analyse and review KPI’s

If you have made it this far, congratulations!  I know this can be a little intimidating to get setup the first time, but once you understand how everything works it usually only takes me a couple hours each year to update it. For each new year, I update by adding an extra column to all the tabs and then copy the formulas over.

KPI’s and savings Rate

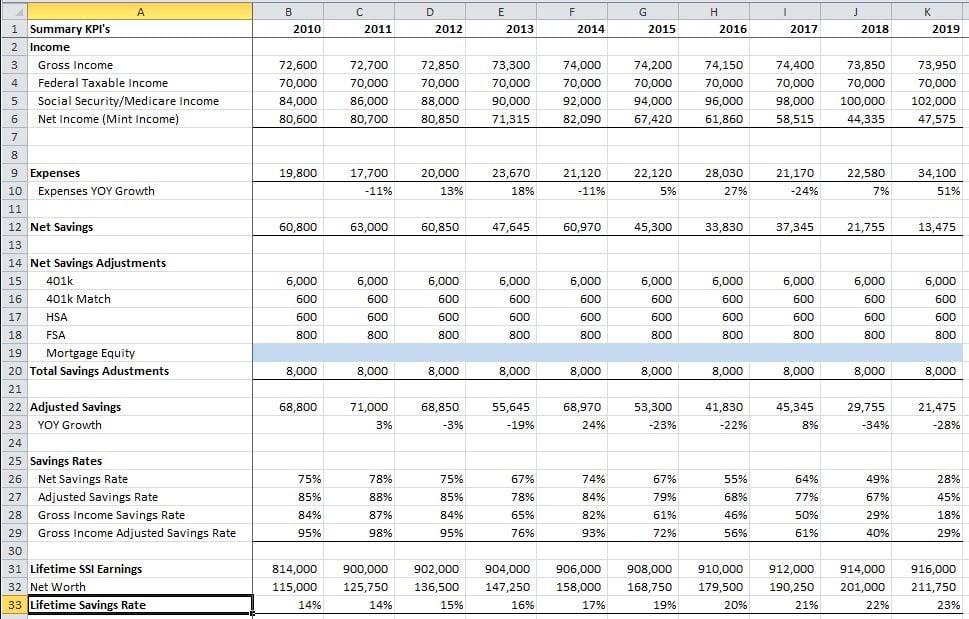
The final tab to review is the Summary KPI’s tab.  This is where this whole document comes together. If you have got everything input and categorized correctly your entire financial picture should come into focus on this tab with very minimal effort. Let’s now walk through how this tab is setup. I start with pulling in the 4 income amounts I track:

  1. Gross Income: Total Earnings, Interest, and Dividends
  2. Federal Taxable Income: What you report on your 1040 (you won’t be able to get this until you file your taxes)
  3. Social Security/Medicare Income. Earnings as reported by SSA
  4. Net Income (Mint Income): Items recorded as Income in Mint

Then we pull in the total expenses from the expenses tab.  Now we are able to start calculating savings and savings rate.  You would think this would be pretty easy but there are a few things to consider that make it more complicated than: (income – expenses) / income. 

Net SAvings

The easiest way to look at savings and savings rate is what I call Net Savings. On line 12, we take our Net Income (Mint Income) subtract our expenses to get Net Savings, and then divide by Net Income to get a Net Savings Rate on line 26. The is the most simple way to look at savings rate and the argument for this method is you can’t save what you don’t receive in your net paycheck.  While this is true, I don’t think it tells the complete story as you could be “saving” via payroll deductions.

Adjusted Net Savings

To account for additional savings that are not counted in Net Savings, I create a series of savings adjustments that I add to savings to create adjusted net savings and the corresponding adjusted net savings rate. The adjustments I have included in the template are as follows:

  1. 401k
  2. 401k Match
  3. HSA
  4. FSA
  5. Mortgage Equity

401k, HSA, and FSA are all pretax payroll deductions so they are added back as a form of savings. I also include the 401k match as I think you should get credit for this as well! The final adjustment is Mortgage Equity.  This can be a little controversial and there are arguments on both sides for if it should be included or not.  I generally tend to agree that paying down your mortgage via the equity portion of your monthly payment is a method of forced savings so I include it here.

gross Savings

There is one flaw to the above adjusted savings rate that I want to point out. If you add back things like your pretax payroll deductions it can inflate your savings numbers as you are mixing pre and post tax dollars.  This can become even more of a problem if you are taking advantage of deferred compensation plans as you can end up with a savings rate over 100% which does not make sense.  To avoid this, you can also look at your savings as a percentage of your gross income. If you use the gross number, your overall savings rate is not going to be as high but I could argue that it is more accurate.

There is no perfect way to measure this so I have included both methods and encourage you to run the numbers and see what works for you.  The key here is making sure the data is accurate and your are consistent in your methodology when looking at it year to year.

lifetime Gross savings rate

Life time savings rate is one of my favorite KPI’s to watch!  In a single number, you can see exactly how much progress you are making towards your financial goals.  The first step is we bring in your cumulative lifetime gross earnings on line 29, from the SSA Earnings tab.  We then bring in your Net Worth from the balance sheet on line 30, and then we divide your net worth by your lifetime gross earnings to calculate your lifetime gross savings rate.  See how powerful this number is?  Of all the income you have earned in your life, how much have you been able to retain through savings and investments?

When I think about the lifetime gross savings rate, I break it down into 5 categories:

  1. <0%: You are living beyond your means and not saving anything
  2. 0-30%: You are starting to plan and save for your future.  You might be early in your career at this point.
  3. 30-70%: You are making solid progress now and well on your way to financial independence!
  4. 70-100%: You are in rare company at this level and are likely already financially independent or will be soon.
  5. >100%:  You are a financial rockstar.  Your savings and investment growth have now eclipsed your entire lifetime earnings. Congratulations!

The final items that I include on the Summary KPI tab are the tax rates and overall net worth growth over time.

Step 11: Review everything with your spouse or significant other

Once this is all done, the last step is I will sit down with my wife Crystal and we will talk about all the data. We will discuss how we did, and the game plan for next year. This step is crucial to make sure we both remain on the same page.  I am our household CFO, but she is the CEO! It is important that even though I handle all the finances, she knows exactly what is going on.

Do you do an annual financial review? What is your end of the year routine? If you do try out the template please leave a comment with any suggestions or improvements.

Download Template: Example Annual Financial Summary v1

Categories
Photography

Photography Tip: #4 Use an Online Publishing Platform like SmugMug to Share Your Photos

I love taking pictures but I also love sharing them online with my friends and family. Back in 2000 I started sharing my albums online via this website. I used a newly added feature to Photoshop that would output an album in HTML for easy uploading to websites. That worked for a few years but it quickly became difficult to manage. When I got my Canon 10D in 2004 I knew I needed a better option. I looked around and found some great reviews of a site called SmugMug and have been using it ever since.

Publishing on SmugMug

I have been using SmugMug for 15 years and love the service they provide! It is fast, intuitive, and makes publishing my images online super simple. They have an awesome plugin for Adobe Lightroom where I can literally have an album published with a few clicks without ever having to leave Lightroom. The plugin even keeps my Lightroom albums synced with my SmugMug albums for any changes.

Here is how I work with SmugMug in 5 simple steps from inside Lightroom:

  1. I use a date based hierarchy on SmugMug that matches my local albums: YYYY -> YYYYMMDD Album Name
  2. When an album is ready to be published in Lightroom, I select all in grid view.
  3. Right click on the year folder in the SmugMug plugin where I want the album to go and select new gallery with include selected items checked.
  4. In the new gallery dialog box I paste the name of the album and usually leave all other defaults as is
  5. Hit publish and I am done!

There are a lot of different services for photo publishing but I have found that SmugMug works best for me.

Categories
Personal Finance

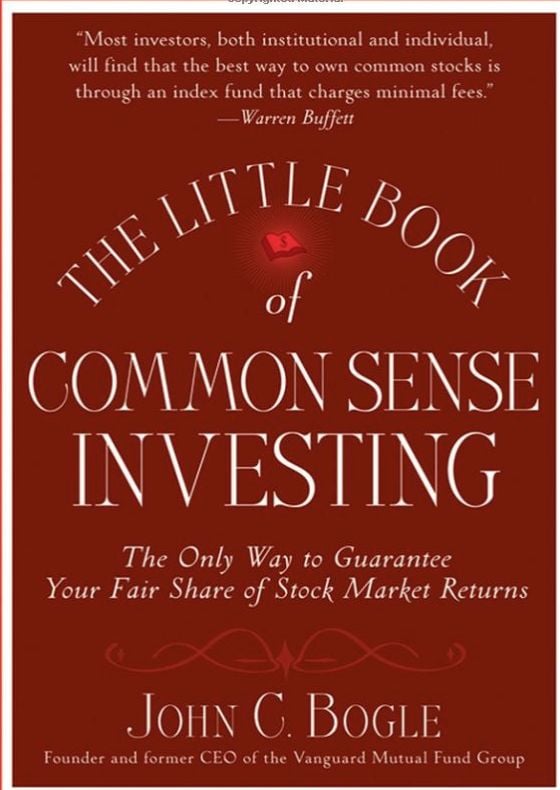
Book Review: The Little Book of Common Sense Investing by John Bogle

The Little Book of Common Sense Investing: The Only Way to Guarantee Your Fair Share of Stock Market Returns

Author: John Bogle
Publish Date: March 5th, 2007
ISBN: 9780470102107
Amazon: https://www.amazon.com/dp/0470102101/
Table of Contents

Chapter 1 A Parable
Chapter 2 Rational Exuberance
Chapter 3 Cast Your Lot with Business
Chapter 4 How Most Investors Turn a Winner’s Game into a Loser’s Game
Chapter 5 The Grand Illusion
Chapter 6 Taxes Are Costs, Too
Chapter 7 When the Good Times No Longer Roll
Chapter 8 Selecting Long-Term Winners
Chapter 9 Yesterday’s Winners, Tomorrow’s Losers
Chapter 10 Seeking Advice to Select Funds?
Chapter 11 Focus on the Lowest-Cost Funds
Chapter 12 Profit from the Majesty of Simplicity
Chapter 13 Bond Funds and Money Market Funds
Chapter 14 Index Funds That Promise to Beat the Market
Chapter 15 The Exchange Traded Fund
Chapter 16 What Would Benjamin Graham Have Thought about Indexing?
Chapter 17 “The Relentless Rules of Humble Arithmetic”
Chapter 18 What Should I Do Now?

My Review

I have been a huge fan of Jack Bogle and Vanguard since I discovered them over 8 years ago.  My sister had worked in the mutual fund industry so I had been blindly invested in mutual funds prior to investing in Vanguard. In 2012, I started reading more about the benefits of index investing and made my first Vanguard purchase of VFAIX on July 3rd, 2012. Over the next year, I would transfer all of my retirement accounts to Vanguad as well as opening a taxable brokerage account.  After that first purchase of VFAIX, I switched to VTSAX and have been 100% investing in VTSAX since June of 2013.

While I had been a fan of Vanguard, and read lots of articles online about Jack Bogle, I had never read any of his books. After reading The Simple Path to Wealth last week, I decided I needed to read The Little Book of Common Sense Investing that is so widely praised and referenced in the financial independence community.

The premise of this book is very simple and Bogle does a great job summarizing the six key concepts in Chapter 17 that is applicably titled “The Relentless Rules of Humble Arithmetic” I will parapharse his six key messages as follows:

  1. Over the long term, stock market returns are created by real investments returns earned by real businesses: dividends and earnings growth
  2. Over the short term, speculative investments drive changes in equity prices based on how much investors are willing to pay for each dollar of earnings growth.  These speculative investments are eventually a wash over the long term
  3. Businesses come and go. The best protection for individual investors against individual stocks is to own the entire market
  4. As a group, all investors earn the gross market returns before taking costs into account.
  5. While investors earn the entire market return they do not capture the entire market as fees, commissions, sales loads, and transaction costs eat away at returns. Gross market returns – costs = net returns for investors
  6. Mutual fund investors have real returns that are lower than the advertised net returns of the fund due to emotional market timing. Gross market returns – costs – timing and selection penalties = net retunrs for mutal funds.

There is a lot more to this book but these are the simple messages that are the foundation to his thinking and methodology. Some have criticized this book as being too simplistic in nature, but I enjoyed reading it.  I have understood most of the benefits of indexing but Bogle goes into a lot of detail backing up his strategy.  He uses a lot of math and numbers to explain the benefits along with this quote:

Remember O Stranger, arithmetic is the first of the sciences, and the mother of safety

The numbers and the math don’t lie and this book is very well researched with a ton of data behind it.  He also does a nice job sprinkling in “Don’t take my word for it” segments from some of the biggest names on Wall Street and why they too believe that indexing is the way to go. The most famous investor of all time Warren Buffet has his four “E’s” quoted

The greatest Enemies of the Equity investor are Expenses and Emotions

I love this!  It could not be any simpler or any truer.  There is a reason it is called personal finance.  In Buffet’s 2013 annual shareholder letter he goes into more detail:

My money…is where my mouth is: What I advise here is essentially identical to certain instructions I’ve laid out in my will. One bequest provides that cash will be delivered to a trustee for my wife’s benefit. (I have to use cash for individual bequests, because all of my Berkshire shares will be fully distributed to certain philanthropic organizations over the ten years following the closing of my estate.) My advice to the trustee could not be more simple: Put 10% of the cash in short-term government bonds and 90% in a very low-cost S&P 500 index fund. (I suggest Vanguard’s.) I believe the trust’s long-term results from this policy will be superior to those attained by most investors—whether pension funds, institutions or individuals—who employ high-fee managers.

Bogle takes on the mutal fund industry in chapters 7, 8, and 9 and points out how bad a deal investors are getting from these funds and how over the long term they simply can not compete with index investing.  After being a mutual fund investor for almost a decade I read these chapters and cringe! He also does a good job addressing the impact of capital flows and how “yesterday’s winners are tomorrow’s losers”. Investors pour money in during the bull market runs and pull money our during the bear markets.  This is the exact opposite of what should be done and thus weighs on performance of mutual fund investors.  His explanation on the difference between real returns of the mutual fund industry and advertised net returns is really well done:

To remind you, the nominal return of fund investors came to just 7.3% per year during 1980 to 2005, despite a wonderful stock market in which a simple S&P 500 index fund earned a return of 12.3%

If you have not read this book, I highly recommend it.  If you are new to indexing, it is a must read and may be the most important book you read on investing.  If you are already on the index train like I am, it will further reinforce this strategy and give you the confidence to stay the course.  I only wish someone had handed me this book earlier in my investing career!

My Rating: 4 Stars


Categories
Personal

Brielle’s 6th Birthday Party

We hosted 10 Kindergarten girls at our house yesterday for Brielle’s 6th birthday party.  The theme that Crystal created this year was an “Art Party”. The kids first decorated their aprons with fabric markers and then each of them got a canvas to paint.

We have not got around to getting a dining room table yet so the dining room became the “Art Studio” with a few table cloths on the floor. Before the kids arrived, Crystal initialed each canvas with blue painters tape.

After all the canvases were painted we pulled the painters tape away to reveal some beautiful artwork!

No party at our house would be complete without one of Crystal’s cakes. She delivered another masterpiece cake creation!

Full Album on SmugMug

Categories
Photography

Photography Tip: #3 Invest in Learning Editing and Post Processing Skills

Previous Tip: Photography Tip: #2 Shoot Using the RAW File Format

Shooting is only half the battle

Capturing images with your camera is only the first half of photography today. The second half, and equally as important stage, is editing and post processing your images. All images from modern cameras need some level of edits or tweaks in post processing to have them reach their full potential. When I am talking about post processing, I am keeping most of the original structure and content of the photo intact. I am not referring to major edits like replacing people, structures, backgrounds etc. that would require Photoshop. Edits like that are beyond the scope of this article.

Selecting your tools

I use Adobe Lightroom CC Classic as my digital darkroom for processing all my edits.  Lightroom is the most popular tool in the industry but there are competitors like Capture One and Luminaire that are trying to take market share from Adobe.  I have used Lightroom since version 4 in 2013. I upgraded to v5 and v6 and stayed on v6 as I did not want to move to a subscription license. Ultimately I caved last year, and upgraded to v9 that I am on today.

As the industry leader in post processing, Adobe Lightroom has a large following and is a strong tool for managing, organizing, and editing all of your photos. I spend a lot of time in Lightroom. It is easily my most used application at home and I custom built my most recent computer to focus just on Lightroom performance. Overall I am happy with what it provides. There could definitely be some improvements, especially when it comes to speed, but it gets the job done for me and helps support my workflow.

Adobe Lightroom is powerful but with a steep learning curve

Adobe Lightroom is an incredibly complex piece of software with a very steep learning curve. I consider myself to be pretty advance when it comes to technology and applications but it has taken a lot of time to get comfortable in Lightroom. Even with this investment, I still find myself learning something new almost every week. At times I feel like I am only just scratching the surface of what can be done with Lightroom!

I encourage you to pickup some book and sit down and make a commitment of time and energy in learning Lightroom (or the tool of your choice). As a photographer today you have to be well versed in both capturing and editing photos in today’s digital world!

Next Tip: Photography Tip: #4 Use an Online Publishing Platform like SmugMug to Share Your Photos

Categories
Work

Carter’s, OshKosh and Skip Hop European Sites are Live!

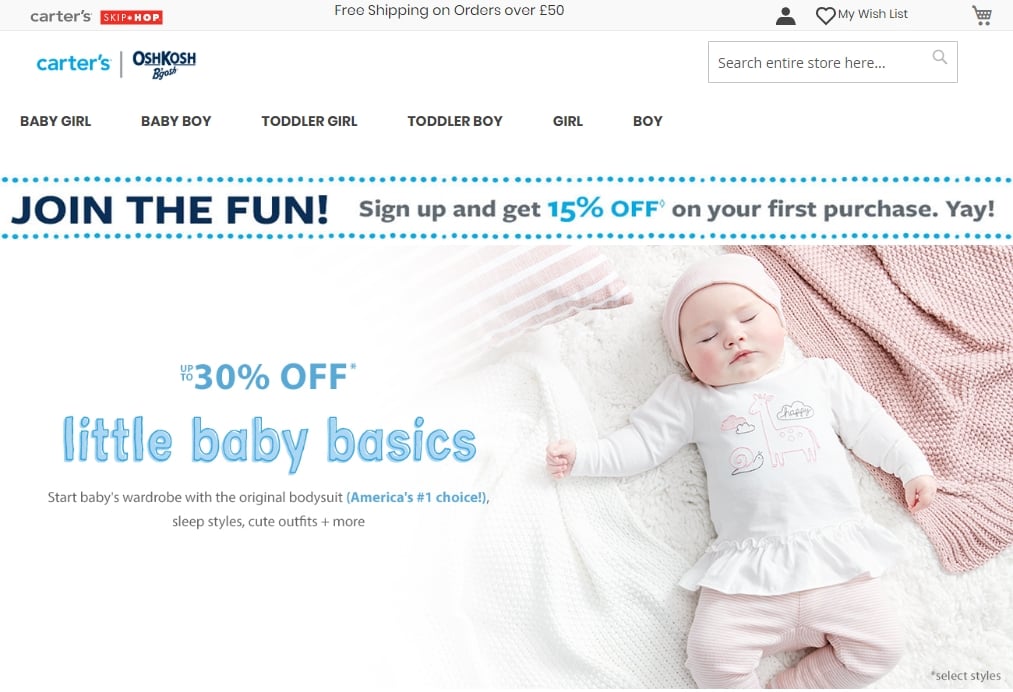
Carter’s has had a strong European business via our wholesale partners like Zalando, Limango, and Babywalz for a number of years.  In addition to these wholesale partners, we have now launched our own official eCommerce sites in Europe!

You can find the Carter’s and OshKosh European sites at the following URL’s
www.cartersoshkosh.eu
www.cartersoshkosh.co.uk
www.cartersoshkosh.de
www.cartersoshkosh.ch
www.cartersoshkosh.fr
www.cartersoshkosh.it

We have also launched 3 European Skip Hop sites to compliment the Carter’s and OshKosh sites above.

Yoiu can find the European Skip Hop sites at the following URL’s:
www.skiphop.co.uk
www.skiphop.de
www.skiphop.fr